SCCM 2012 R2 Windows XP refresh to Windows 7
As the deadline for the End of Life of Windows XP approaches I was tasked with the job to make the upgrade to Windows 7 happen in the simplest manner possible. Here is my story.
My first objective was how:
1. You could make two task sequences. One to capture user data and the second to deploy the OS and restore the data. This made no sense to me so I didn't go this route. I mean there had to be a better way.
2. You could make one task sequence that captured the user data deployed the OS and restored the data all in one sequence. This is a completely unattended approach and that's the way I like it.
You need a few things to get started.
1. You need Windows AIK for Windows 7 and the supplement which can be found at the following links.
Windows 7 AIK http://www.microsoft.com/en-us/download/details.aspx?id=5753
Windows 7 AIK Supplement http://www.microsoft.com/en-us/download/details.aspx?id=5188
*Later on you'll need the Windows 8 AIK as well. The links are referenced below.*
This will provide you with the versions of WinPE (Version 3.1) you'll need to complete this process. Installation instructions are on the download page from the links above.
I would follow this link if you would like to customize your WinPE boot image. http://technet.microsoft.com/en-us/library/dd744533(WS.10).aspx
Find the boot image you created: C:\WinPE_<archType>\ISO\sources\boot.wim and copy it to your ConfigMgr server.
Open the ConfigMgr console and navigate to Software Library > Operating Systems > Boot Images
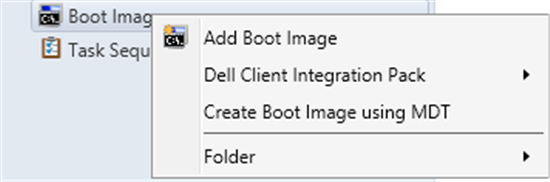
Step 2 a lot (if not completely) is borrowed from this page: http://blogs.technet.com/b/configmgrteam/archive/2013/09/12/how-to-migrate-user-data-from-win-xp-to-win-8-1-with-system-center-2012-r2-configmgr.aspx
Here are the components that you’ll need:

This pretty much does it on how to get the basic Task Sequence setup and ready to deploy. On my next post I will tackle the process I had to take to accomplish this on laptops as WinPE 3.1 did not have the drivers I needed.
My first objective was how:
1. You could make two task sequences. One to capture user data and the second to deploy the OS and restore the data. This made no sense to me so I didn't go this route. I mean there had to be a better way.
2. You could make one task sequence that captured the user data deployed the OS and restored the data all in one sequence. This is a completely unattended approach and that's the way I like it.
You need a few things to get started.
1. You need Windows AIK for Windows 7 and the supplement which can be found at the following links.
Windows 7 AIK http://www.microsoft.com/en-us/download/details.aspx?id=5753
Windows 7 AIK Supplement http://www.microsoft.com/en-us/download/details.aspx?id=5188
*Later on you'll need the Windows 8 AIK as well. The links are referenced below.*
This will provide you with the versions of WinPE (Version 3.1) you'll need to complete this process. Installation instructions are on the download page from the links above.
I would follow this link if you would like to customize your WinPE boot image. http://technet.microsoft.com/en-us/library/dd744533(WS.10).aspx
Find the boot image you created: C:\WinPE_<archType>\ISO\sources\boot.wim and copy it to your ConfigMgr server.
Open the ConfigMgr console and navigate to Software Library > Operating Systems > Boot Images
Find the boot image's path and proceed to import it, naming it appropriately. Make sure you look in the properties of the boot image and under the Data Source tab you select "Deploy this Boot Image from the PXE-enabled distribution point"
Step 1 is completed.Step 2 a lot (if not completely) is borrowed from this page: http://blogs.technet.com/b/configmgrteam/archive/2013/09/12/how-to-migrate-user-data-from-win-xp-to-win-8-1-with-system-center-2012-r2-configmgr.aspx
Here are the components that you’ll need:
- A System Center 2012 R2 Configuration Manager site.
- An operating system image package for Windows 8.1.
- This process assumes you’re using the default boot images (Windows PE 5).
- The Windows ADK for Windows 8 and a computer separate from the site server on which to install it.
- A state migration point for capturing and restoring the user data.
- Either a PXE Service Point or bootable media.
- A package for USMT 8.1 is automatically created when you install or upgrade to System Center 2012 R2 Configuration Manager, as the Windows ADK for Windows 8.1 is a setup prerequisite. (This is specifically for those who have SCCM 2012 R2 installed)
- You also need a package for USMT 5, which comes with the Windows ADK for Windows 8. Two versions of the ADK cannot be installed on the same computer so you will need to install this ADK on a separate computer.
- Extract the USMT files from the Windows ADK for Windows 8 installation folder, C:\Program Files (x86)\Windows Kits\8.0\Assessment and Deployment Kit\User State Migration Tool (by default), and transfer them to a common location for package source files. (Make sure you choose the correct architecture you need)
- Follow the instructions on How to Create a USMT Package, making sure to point the package source to the location of the USMT 5 folder from the previous step.
- Finally, ensure that the contents for both USMT packages are properly distributed.
- Create a task sequence using the option to Create a new custom task sequence. (See How to Create Task Sequences for more information.)
- Edit the new custom task sequence and add steps to Request State Store, Capture User State and Release State Store.
- On the Capture User State step, select the USMT 5 package you created above. Customize it to use miguser.xml, and to use VSS, as shown below. While not in the sample image below, we also recommend you check Enable verbose logging in this scenario.
After this things get a bit tricky because at the time of the borrowed content above there was a critical flaw in this process that was not mentioned. In order to do an in-place refresh of a Windows XP machine to anything greater than XP you HAVE to use a WinPE 3.1 boot image that we created earlier. To do this Right click on the task sequence -> Properties -> Tick 'Use a boot image' -> Browse and find the WinPE 3.1 image that you created earlier.
Another thing that is not mentioned in those articles that there was a critical flaw in the USMT 4.0 that caused Windows XP computers to fail after mounting the boot image prior to rebooting the computer and refreshing. After I stumbled on this forum post http://social.technet.microsoft.com/Forums/en-US/6e934990-999a-4367-860a-3ce4e5eda956/sccm-2012-r2-error-0x800700c1?forum=configmanagerosd and they recommend crazy file mods for a work around. I didn't like that, and after some more digging I found a hotfix that addressed this very issue. http://support.microsoft.com/kb/2910552 <-- This hotfix must be installed on the server and the client package must be deployed to the computers you're trying to refresh prior to any of this working. I'd recommend pushing this out to all Windows XP machines prior to trying to refresh.
*Update* CU1 for SCCM 2012 R2 also addresses this. Be sure to push this out to your clients or you could have an unbootable machine as the task fails after modifying your MBR.This pretty much does it on how to get the basic Task Sequence setup and ready to deploy. On my next post I will tackle the process I had to take to accomplish this on laptops as WinPE 3.1 did not have the drivers I needed.


This comment has been removed by a blog administrator.
ReplyDeleteThis comment has been removed by a blog administrator.
ReplyDeleteThis comment has been removed by a blog administrator.
ReplyDeleteThis comment has been removed by a blog administrator.
ReplyDeleteDon't forget
ReplyDeleteAdding with DISM:
WinPe-Scripting
WinPe-WMI
WinPE-WDS
MS SCCM 2012 Online Training
ReplyDelete